Employees and permissions
The Employees page lists everyone on your team. From here you add people, set their pay rate and employment type, and decide who gets a login to the employee portal.
MeridianOS™ has one permission switch per employee, Collect payments. This chapter explains what that switch controls and what every employee with a login can see.
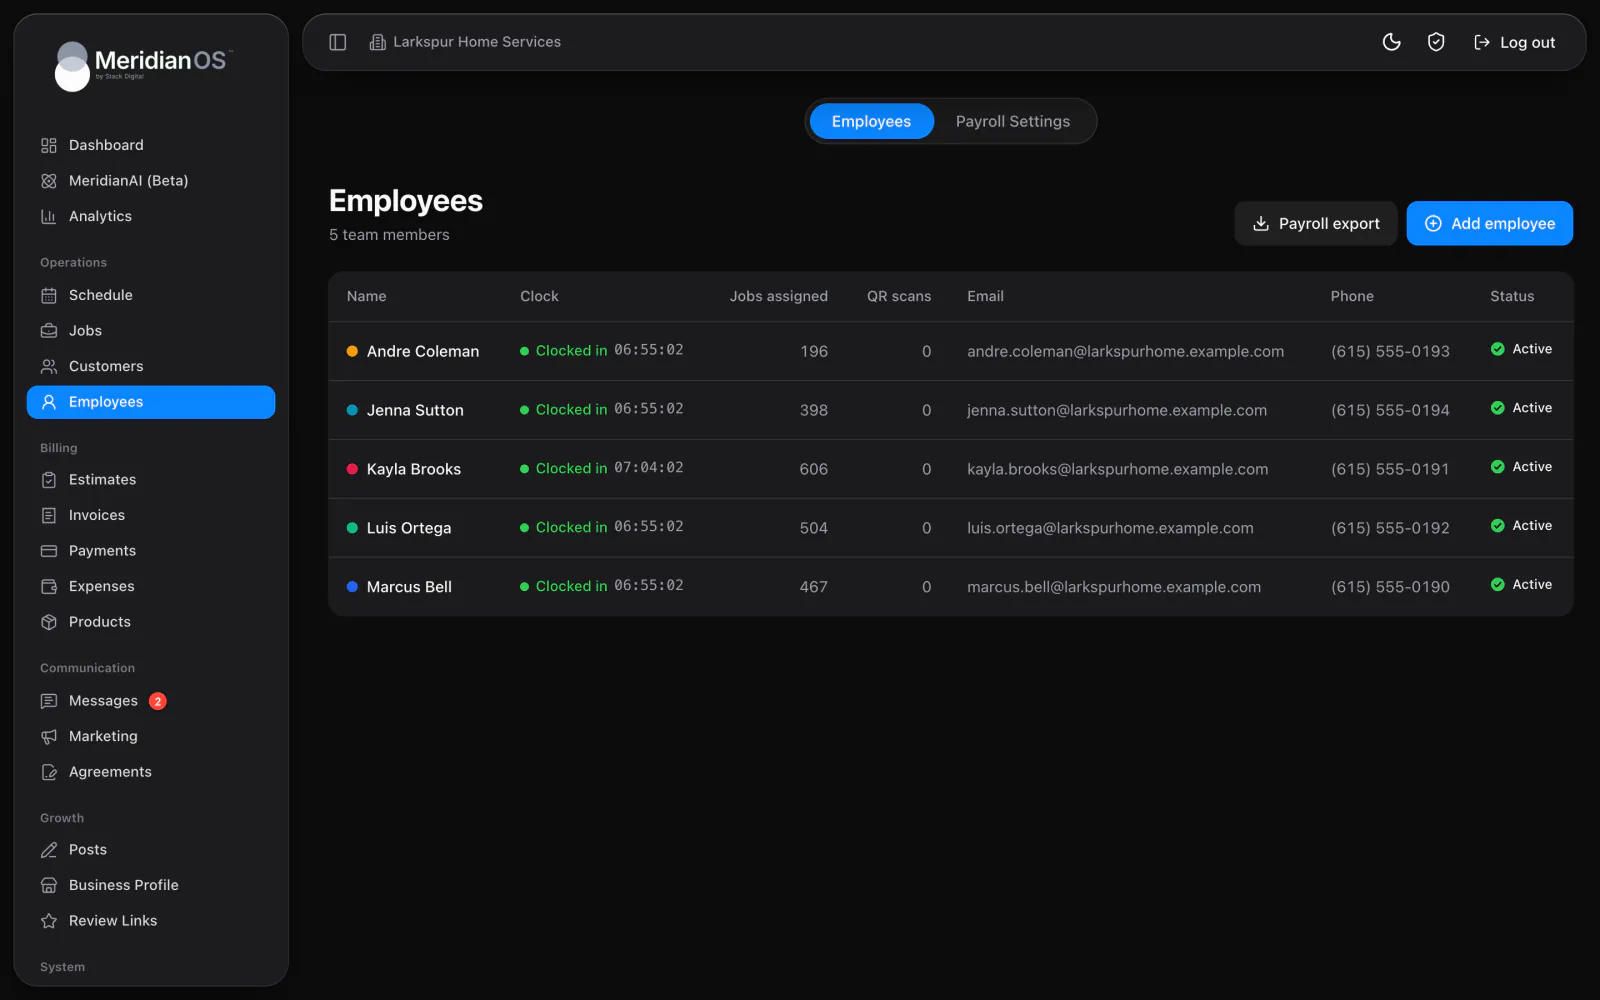
The employee list
The page has two tabs, Employees and Payroll Settings, and two buttons, Payroll export and Add employee. Payroll settings and the export are covered in Time clock and payroll.
| Column | What it shows |
|---|---|
| Name | The employee's name with their calendar color dot. Contractors carry a Contractor (1099) badge. |
| Clock | Clocked in with a running timer in hours, minutes and seconds, or Clocked out. It refreshes every 30 seconds. |
| Jobs assigned | The jobs assigned to this person. |
| QR scans | Scans of their personal review QR code. See Employee portal. |
| Email, Phone, Status | Their contact details and status. |
Add an employee
- Select Add employee.
- Enter a First name. This is the only required field.
- Add a Last name, Email and Phone if you have them.
- Pick a Calendar color from the 20 choices. It appears as a dot beside their name on the employee list.
Adding an employee does not create a login. You give portal access separately, as described in Give an employee a portal login.
The employee page
Select an employee to open their page. Click any of these fields to edit it in place.
| Field | What to know |
|---|---|
| First name, Last name | The employee's name. |
| Email, Phone | Their contact details. |
| Pay rate | The hourly rate, shown in dollars per hour. Earned amounts on the time clock multiply hours by this rate, and the payroll export uses it too. |
| Employment type | Employee (W2) or Contractor (1099). |
| Calendar color | One of 20 colors. |
The page also has a table of the jobs assigned to this person. Filter it by Status or by Scheduled (Anytime, Today, Next 7 days). Sort it by Job, Scheduled or Amount.
The employee's time clock entries are on the same page. See Review and correct time entries.
Deactivate or delete an employee
- Select Deactivate when someone leaves. Deactivating an employee signs them out everywhere at once.
- Select Activate to bring a deactivated employee back.
An employee who has hours or completed jobs on record cannot be deleted, so their pay history is kept. Deactivate them instead.
Give an employee a portal login
The Portal access card on the employee page controls that person's login to the employee portal.
- Open the employee's page and find Portal access.
- Set a Username. It is not case sensitive, and it cannot match another employee's username or an admin's.
- Set a Password that meets the rules below.
- Give the employee their username and password. They sign in on the same login page you use.
| Password rule | Minimum |
|---|---|
| Length | 12 characters |
| Uppercase letters | 1 |
| Numbers | 1 |
| Special characters | 1 |
The card shows whether the employee has two-factor turned on and how many passkeys they have. If they are locked out, use Reset 2FA or Remove passkeys.
Remove access ends the employee's login without touching their jobs or history.
Changing an employee's password, removing their access or deactivating them signs them out everywhere at once.
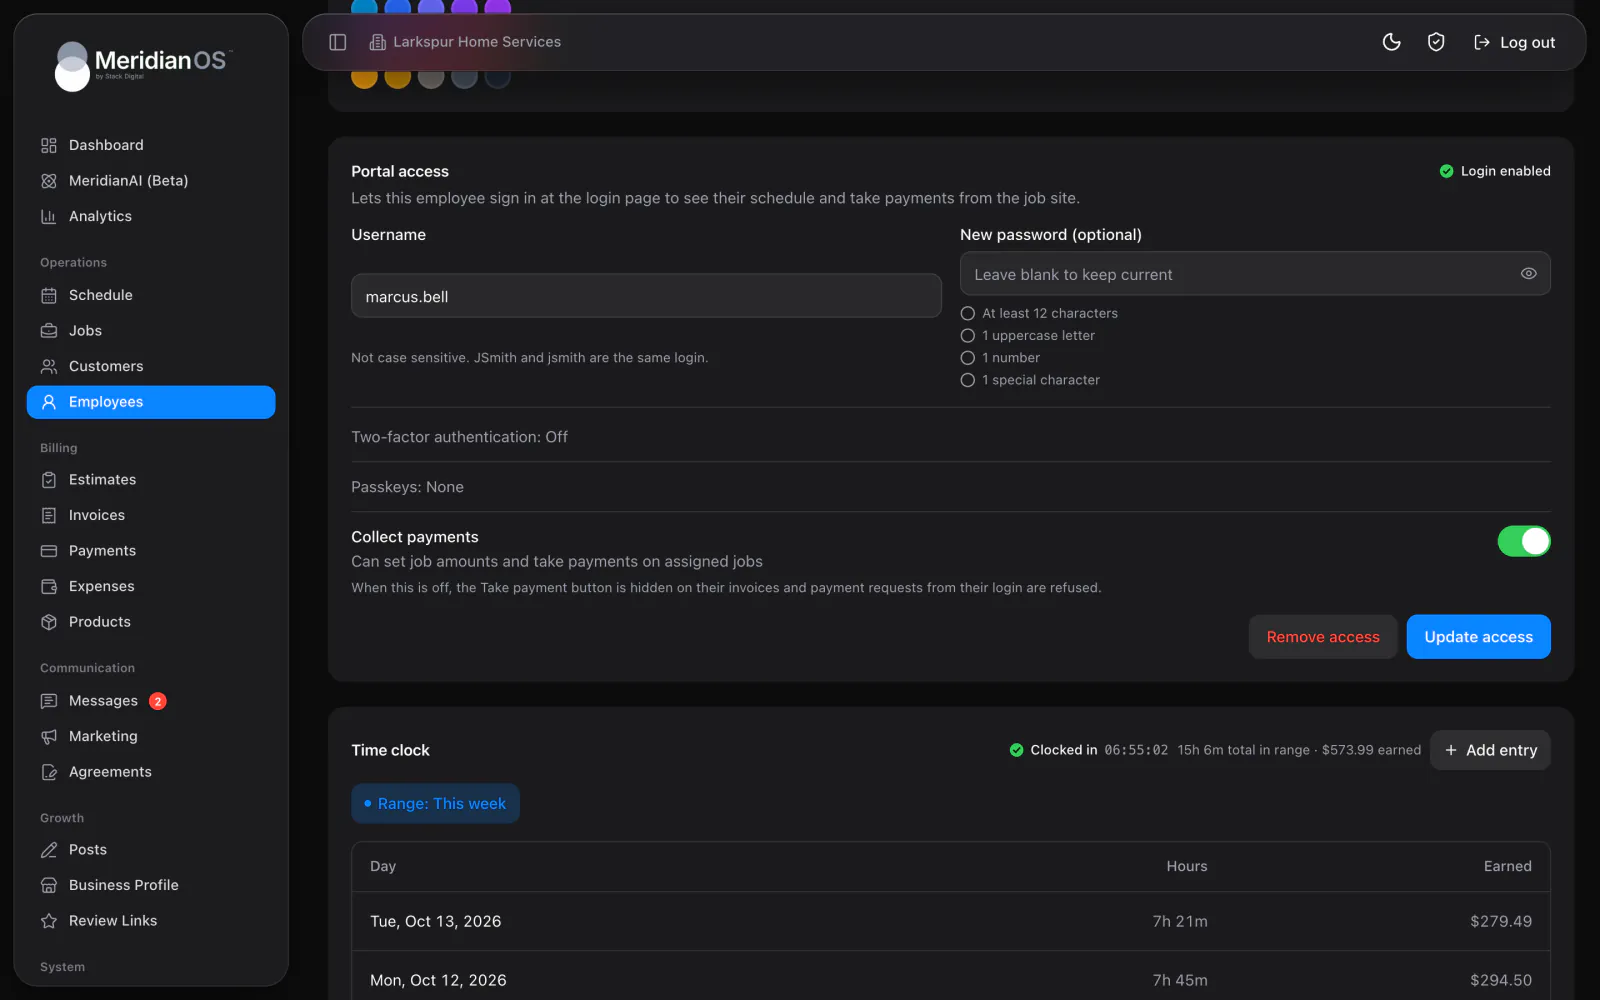
The Collect payments switch
Collect payments is the one permission switch each employee has. Its description reads Can set job amounts and take payments on assigned jobs.
| Switch | What the employee can do |
|---|---|
| On | Set job amounts and take payments on the jobs assigned to them. They can also edit line items on Draft or Open invoices. |
| Off | The Take payment button is hidden, and any payment request from their login is refused. They cannot change invoice or job amounts. |
MeridianOS™ checks the switch on every payment request it receives, so an employee with it off cannot take a payment from any screen or device.
Taking a card payment also needs your Stripe account to be connected. See Payments. The payment methods an employee sees are listed in Employee portal.
What every employee with a login can see
There are no per-employee switches for hiding prices, hiding customer contact details or hiding pay. Every employee with a portal login sees the following.
- The job amount on each job assigned to them.
- The customer's name, phone and address for those jobs.
- Their own pay, once you set an hourly rate for them.
Access stops at their own work. An employee can only open the jobs assigned to them, plus the invoices and customer text threads tied to those jobs.
Tips per employee
Tips appear only when tipping is turned on in Settings. With tipping on, the employee page lists each tipped job with the job tip, the number of people assigned and Their share. The time clock header on the same page shows tips for the selected date range.
- A tip is split evenly across everyone assigned to the job.
- Leftover cents are handed out the same way every time, so the shares always add up to the full tip.
Related
- Employee portalWhat your employees see and can do when they sign in: schedule, jobs, invoices, payments, time clock, earnings and review QR code.
- Time clock and payrollHow employees clock in and out, how you correct and approve hours, and how to set overtime, pay periods and the payroll export.
- Signing in and securityHow to sign in, set a password, add two-factor or a passkey, manage admin accounts, and use the app lock.
- Payments, payouts and refundsConnect Stripe, see how customers pay online, set fees and tips, and handle receipts, refunds, disputes and payouts.
- Team and access overviewGive each employee a login and decide who can take payments.
Updated November 10, 2026.